About This Lab
This lab is based on Ethical Hacking: A Hands-on Introduction to Breaking In by Daniel G. Graham. It follows the book’s hands-on approach to learning key offensive security skills ranging from network attacks and cryptography to exploitation, and post-exploitation techniques.
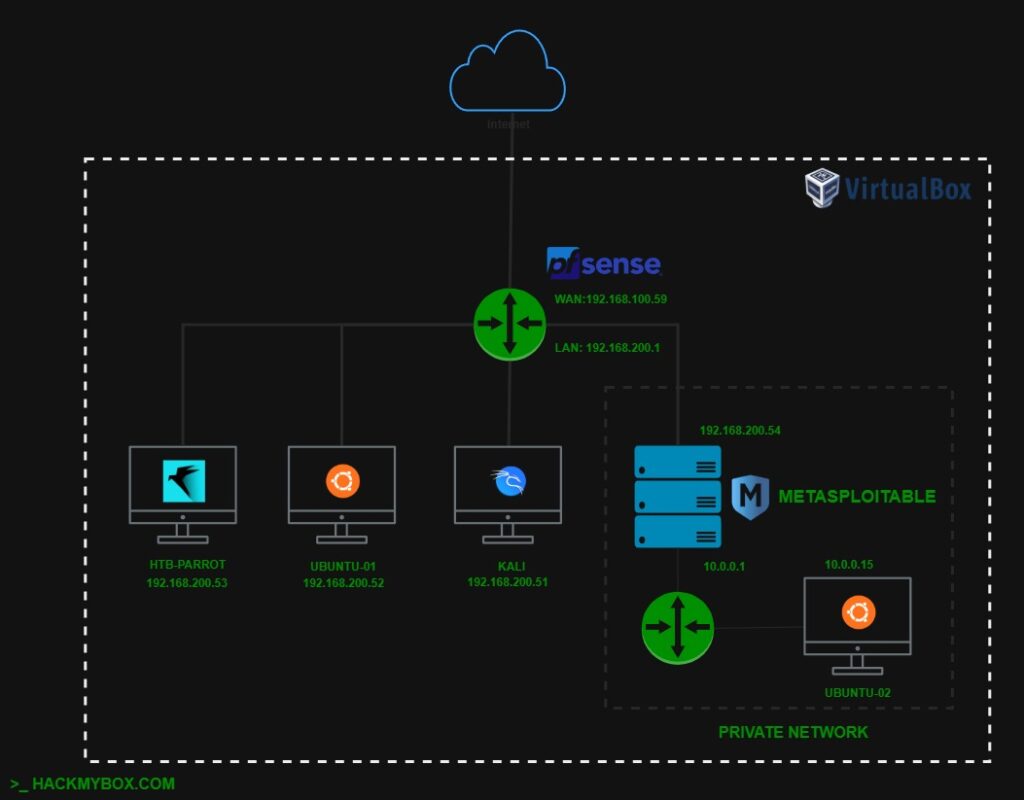
The lab uses pfSense to create a segmented network environment, isolating the internal virtual network from the host LAN. This setup provides a safe space to practice attacks like ARP spoofing, reverse shells, phishing, and privilege escalation in a controlled, realistic setting.
Download the software required to set up the lab:
VirtualBox
https://www.virtualbox.org/wiki/Downloads
pfSense
https://atxfiles.netgate.com/mirror/downloads
Ubuntu
https://ubuntu.com/download/desktop
Kali Linux
https://www.kali.org/get-kali/#kali-platforms
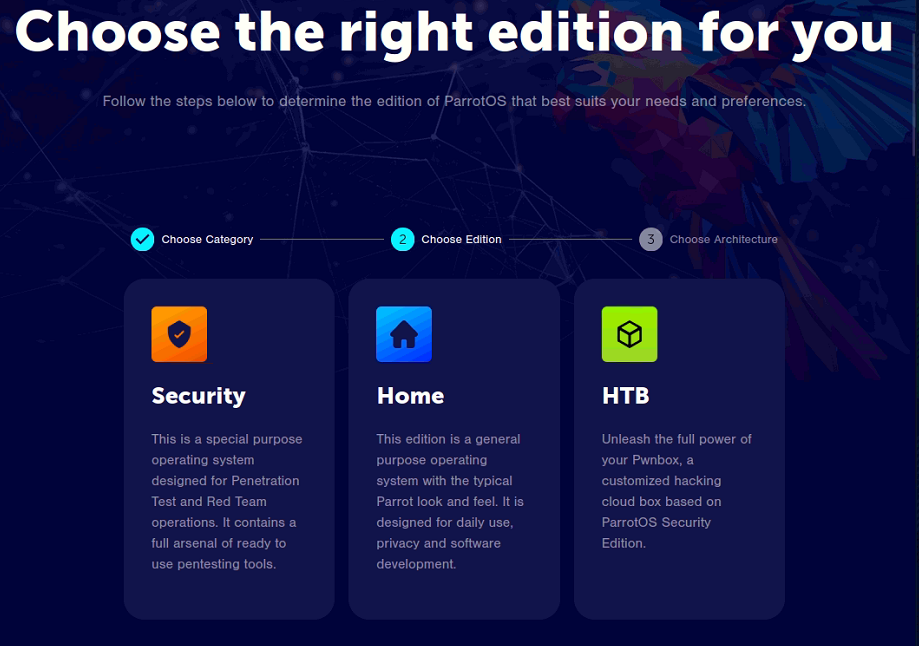
HTB Parrot (Recommended)
https://parrotsec.org/download/?version=hackthebox
Metasploitable 2
Step 1: Set Up VirtualBox
- Install VirtualBox with default settings.
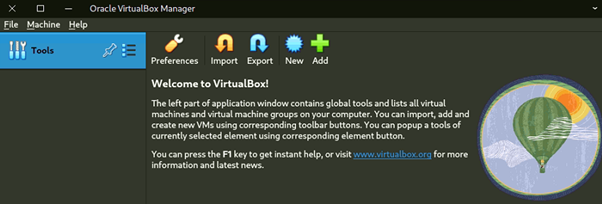
- Launch VirtualBox to confirm it opens (should display a home screen)
- For more detailed guide visit https://www.virtualbox.org/manual/
Step 2: Set Up pfSense Virtual Machine
2.1. Download pfSense:
- Download and unzip the ISO file
- In VirtualBox, click New.
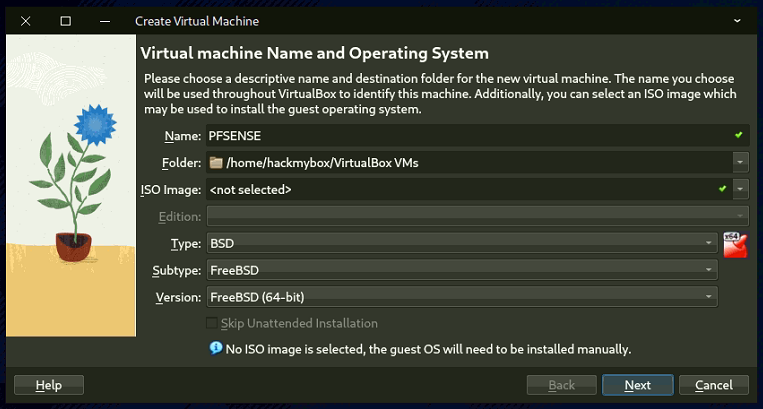
- Set Name: pfSense, Type: BSD, Version: FreeBSD (64-bit).
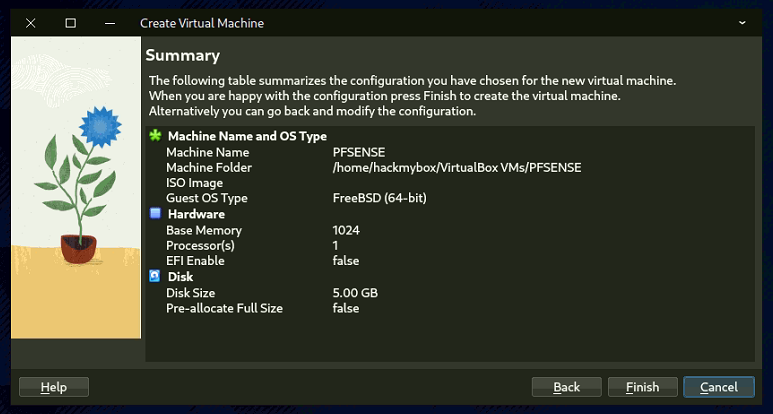
- Allocate 1024MB RAM.
- Create a virtual hard disk (VDI, dynamically allocated, 5GB).
2.2. Configure Network:
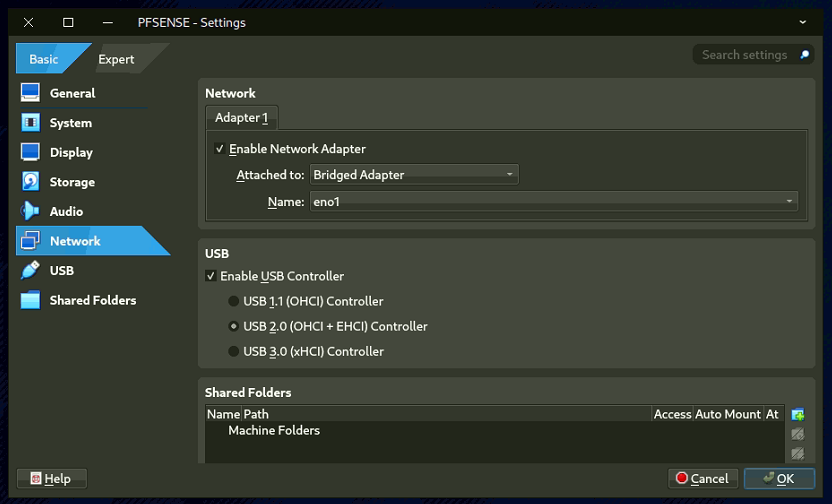
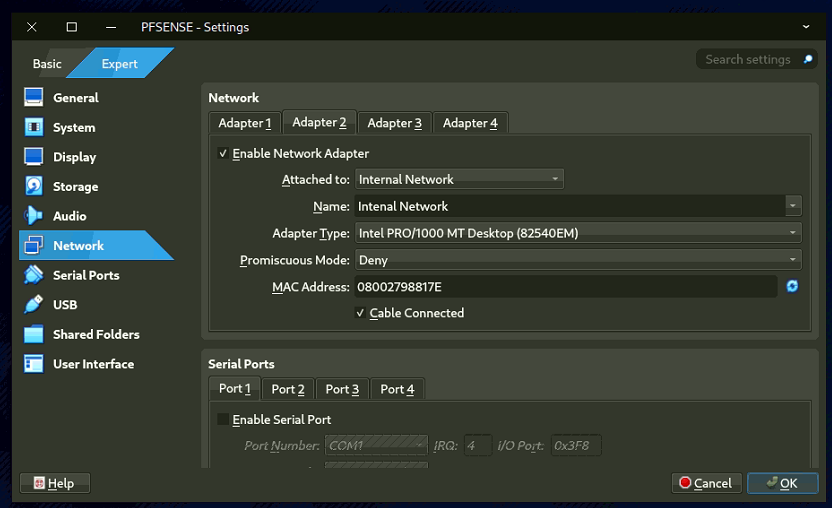
- Right-click pfSense VM, select Settings > Network.
- Adapter 1: Enable, set to Bridged Adapter (select your network card).
- Adapter 2: Enable, set to Internal Network, name it Internal LAN.
2.3. Install pfSense:
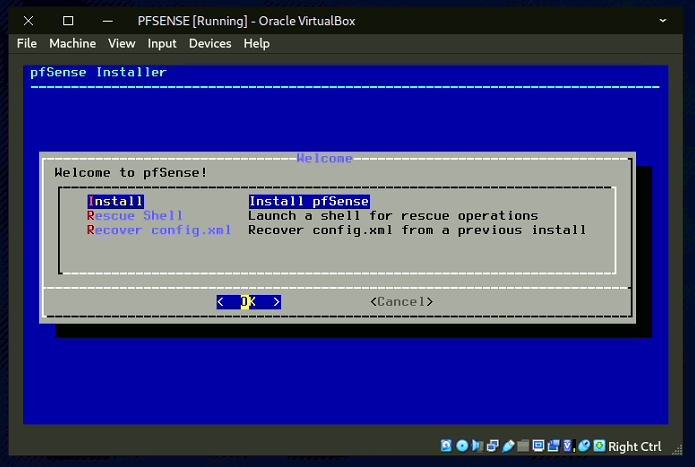
- Click the folder icon, add the pfSense ISO, and click Start.
- After installation, select Reboot and press ENTER.
- Power off the VM (File > Close > Power off).
- Go to Settings > Storage , remove the pfSense ISO, and click OK.
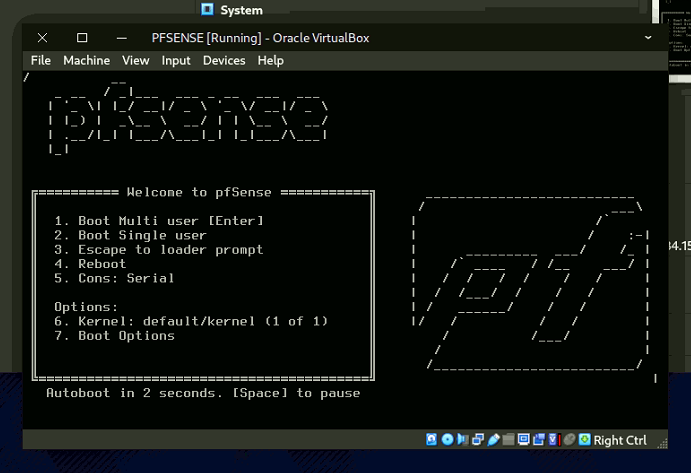
- Restart pfSense VM; it should display WAN and LAN interfaces ( 192.168.100.1/24).
- To reconfigure WAN/LAN press "2) Set interface(s) IP address (192.168.200.1/24)
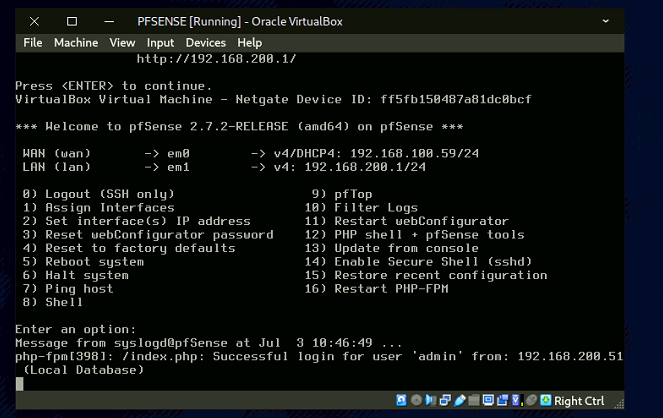
- Access pfSense on the internal network to view or edit your network preferences.
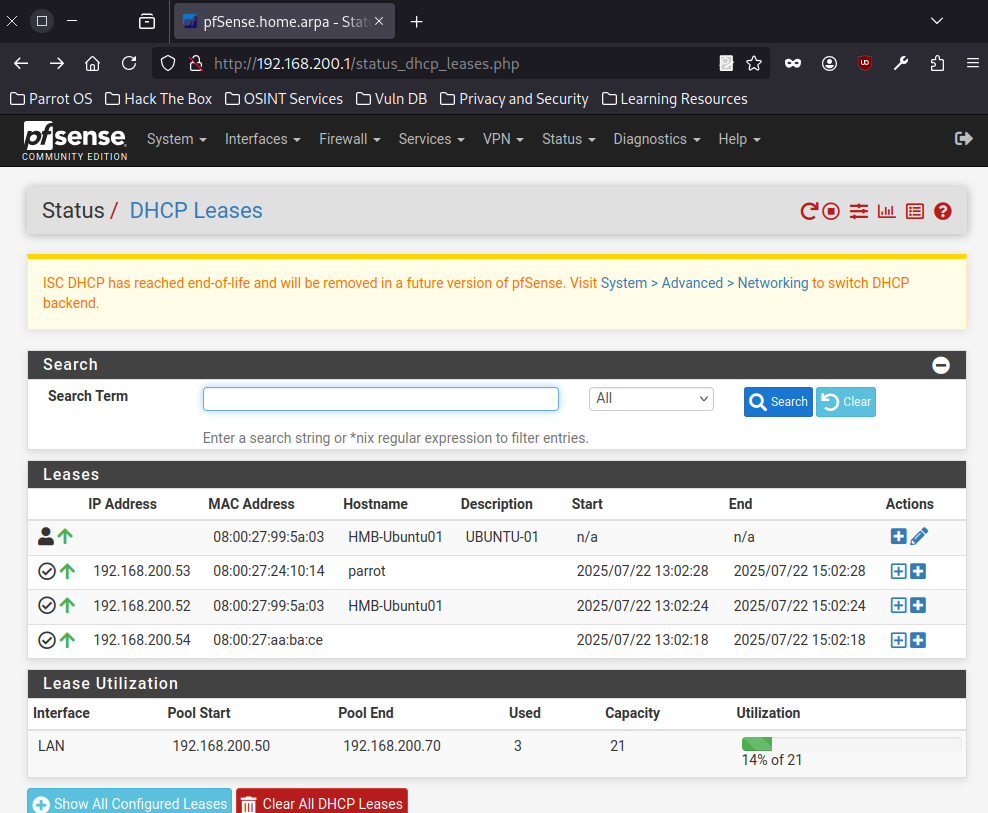
Step 3: Set Up Metasploitable Virtual Machine
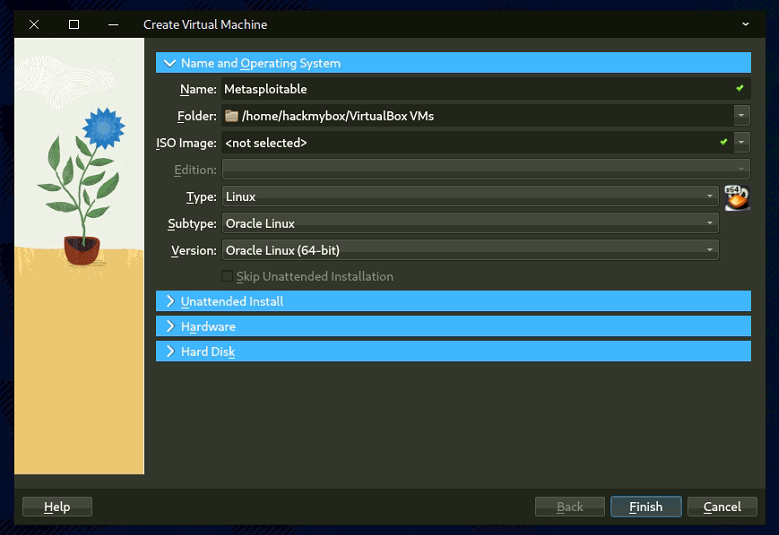
3.1 Setup Metasploitable 2 Virtual Machine.
-
- For complete guide see link below.
- https://docs.rapid7.com/metasploit/metasploitable-2/
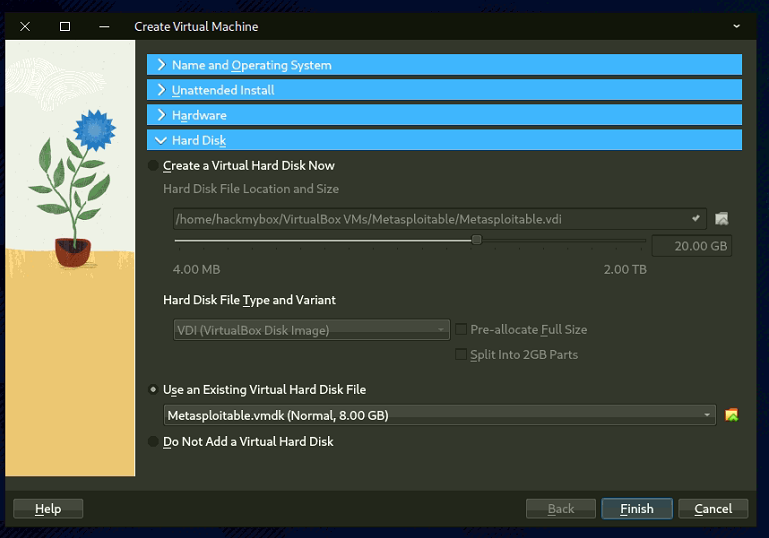
- Extract the downloaded file.
- Select use "Existing Virtual Hard Disk File"
- Network Adapter 1 attached to "Internal Network"
- Network Adapter 2 attached to "Private Lan"
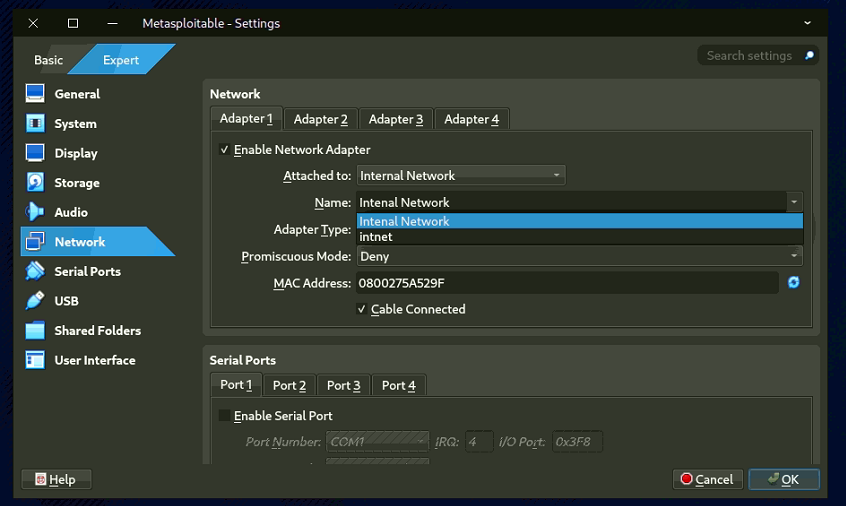
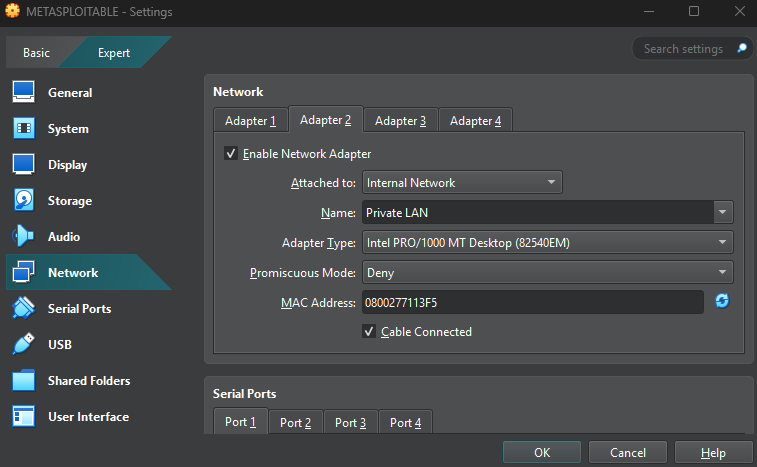
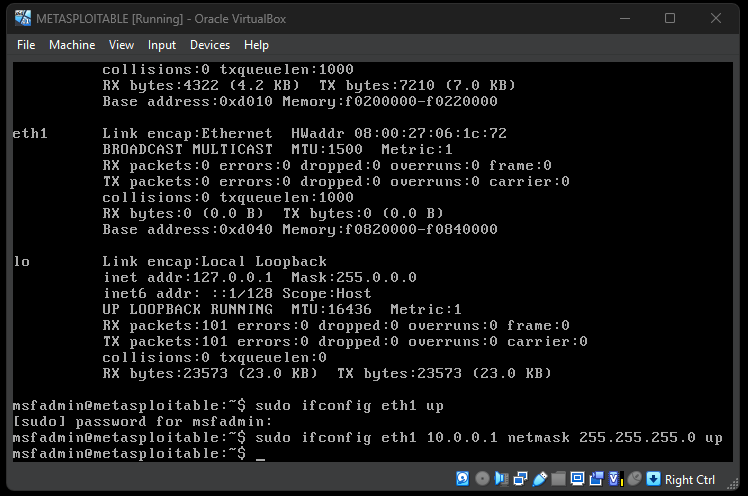
Step 4: Set Up Kali Linux Virtual Machine
4.1 Download Kali Linux:
-
- Check the official guide from Kali on how to install VM on Virtualbox.
- https://www.kali.org/docs/virtualization/install-virtualbox-guest-vm/
-
Download the Kali Linux image for VirtualBox and then extract it.
-
Create a virtual machine and select the option to use an existing virtual hard disk file.
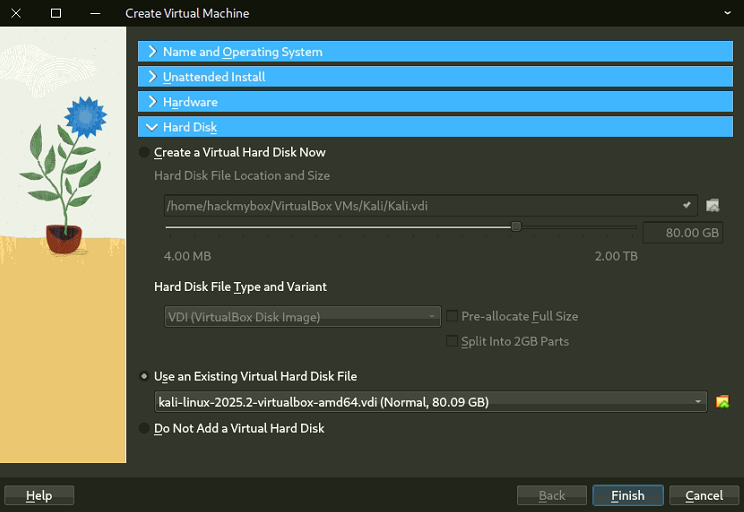
4.2 Configure Network:
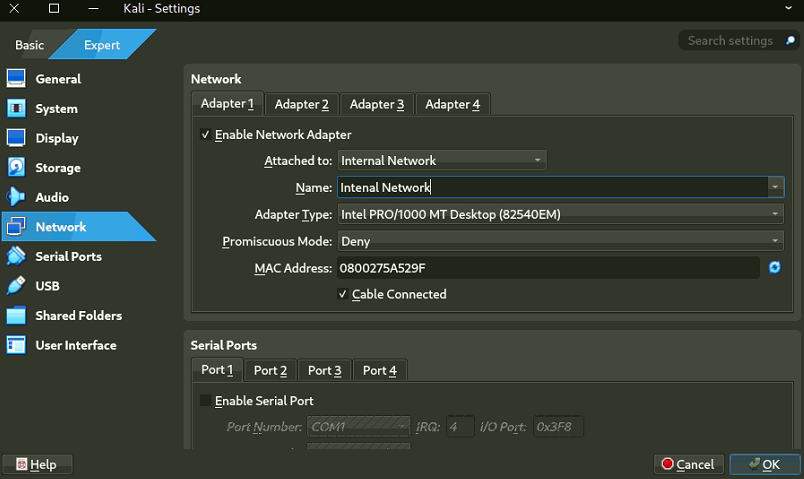
- Right-click Kali VM, select Settings > Network.
- Adapter 1: Enable, set to Internal Network, name Internal LAN.
4.3 Start Kali:
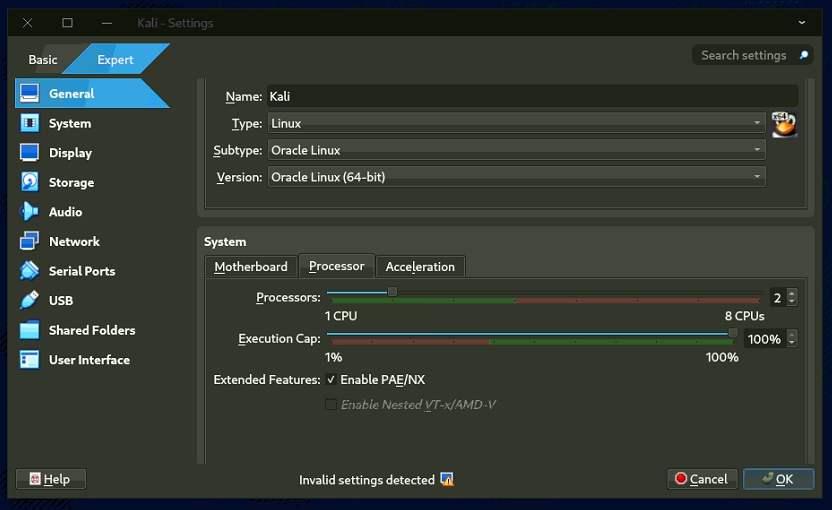
- Open the VM; ensure PAE/NX is enabled in Settings > General > Processors if you see a black screen.
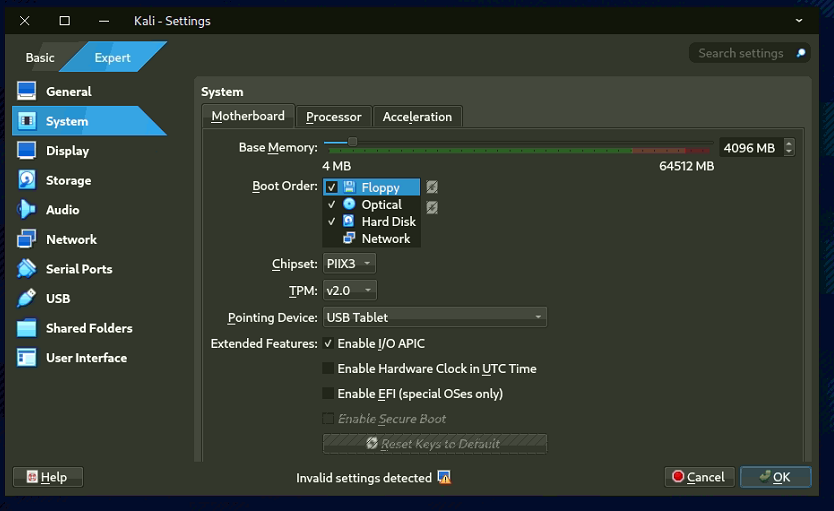
- Also need to disable Secure Boot & EFI
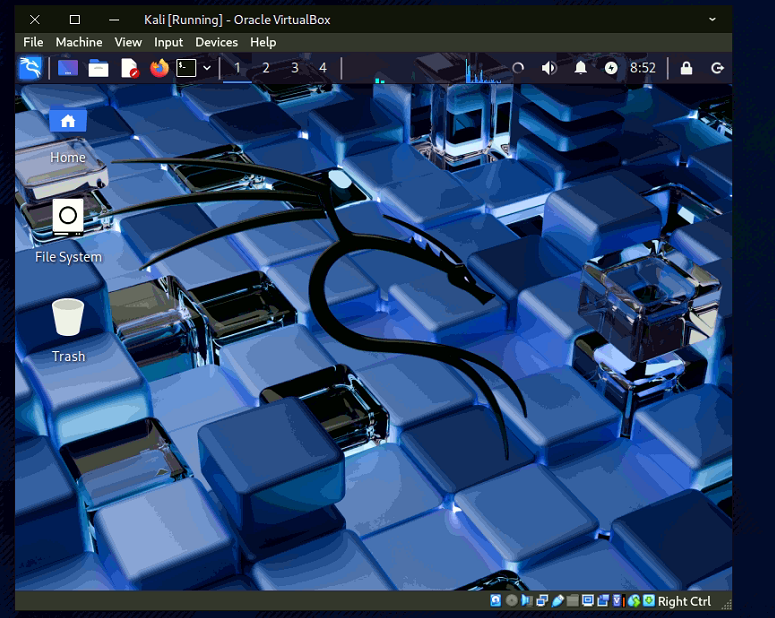
- Log in with username: kali, password: kali.
Step 5: Set Up Ubuntu Linux Desktop Virtual Machine
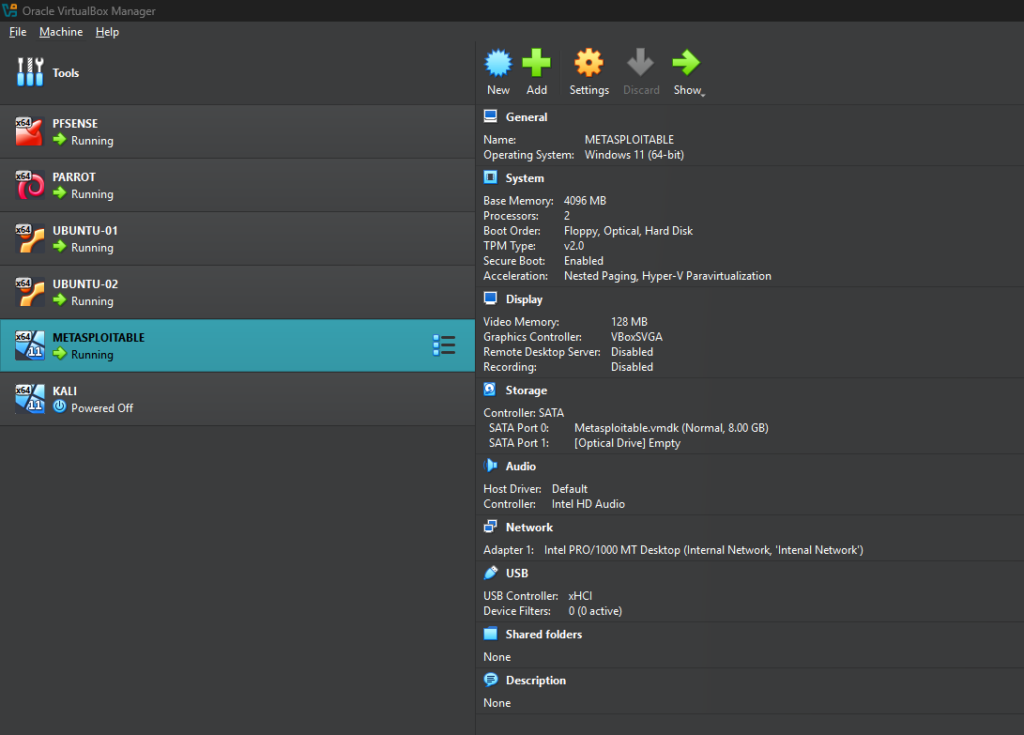
We will set up two Ubuntu Virtual Machines (VMs) using VirtualBox. The first machine will be connected to an Internal Network (192.168.200.0/24) network. The second machine will be isolated and connected to a Private LAN (10.0.0.0/24) network.
5.1 Create Ubuntu VM (UBUNTU-01)
- Follow this guide to setup Ubuntu on Virtualbox.
- https://ubuntu.com/tutorials/how-to-run-ubuntu-desktop-on-a-virtual-machine-using-virtualbox#1-overview
Notes:
In case error booting go VM settings > screen > set the 'graphics controller' to VBoxVGA or VBoxSGVA > make sure 'enable 3D acceleration' is disabled.
5.2 Configure Network (UBUNTU-01)
- Right-click Ubuntu VM, select Settings > Network .
- Adapter 1: Enable, set to Internal Network , name Internal Network.
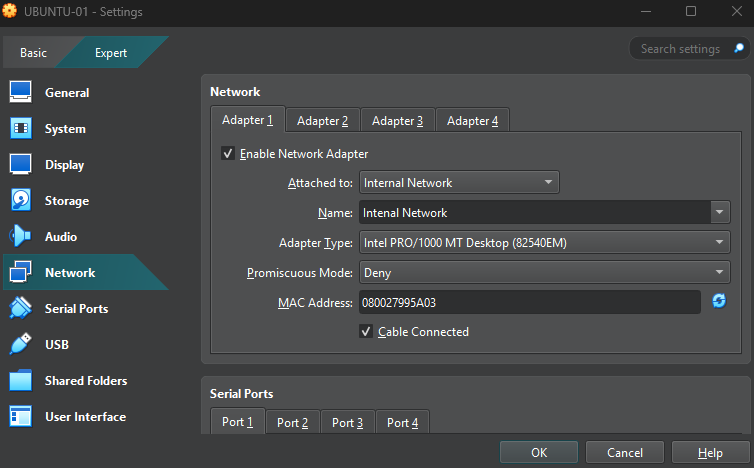
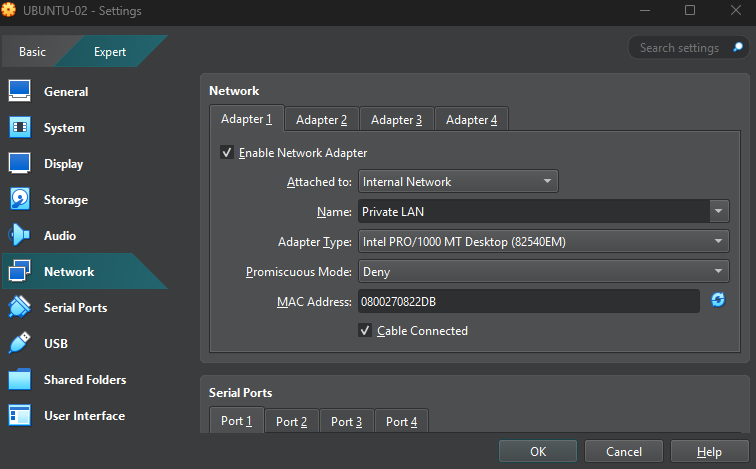
5.3 On the a second Ubuntu machine (UBUNTU-02)
- Configure network adapter attached to "Internal Network" Private LAN.
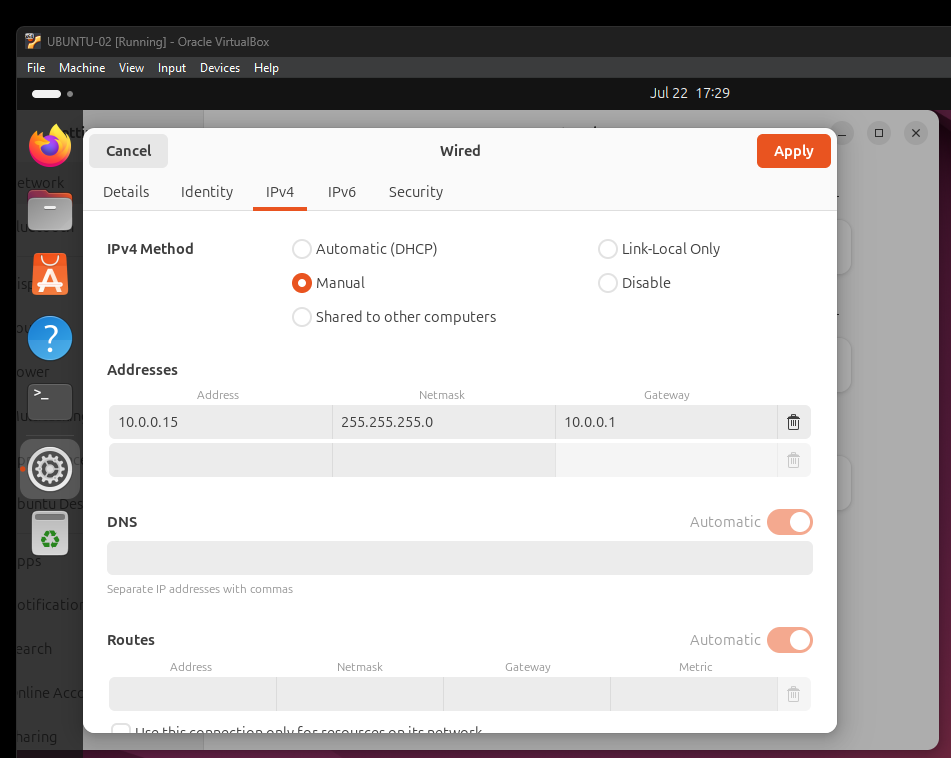
- Manually setup IP address 10.0.0.15
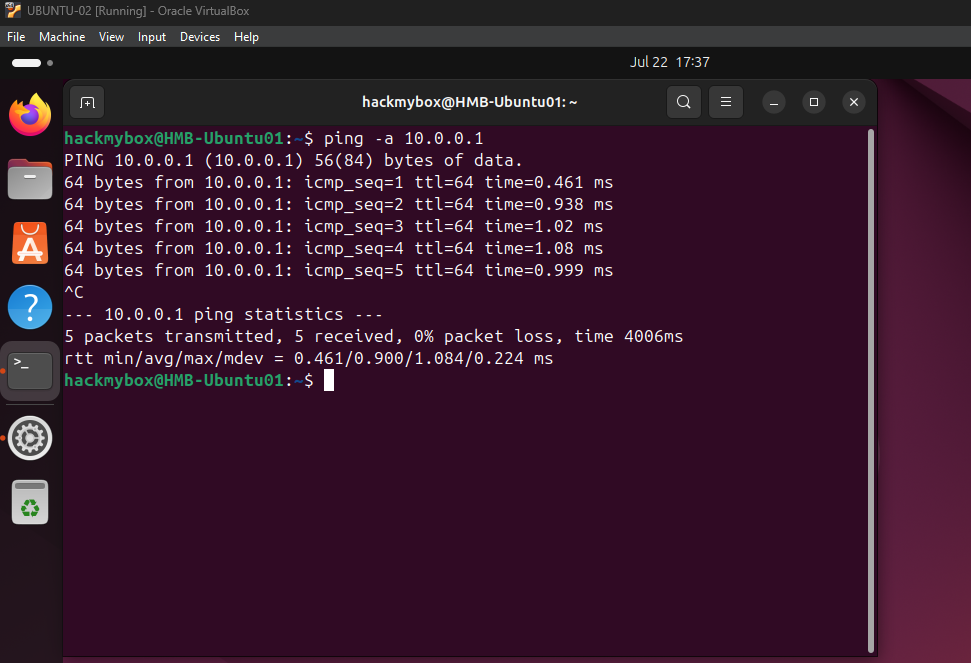
- Ping Metasploitable 2 (10.0.01)
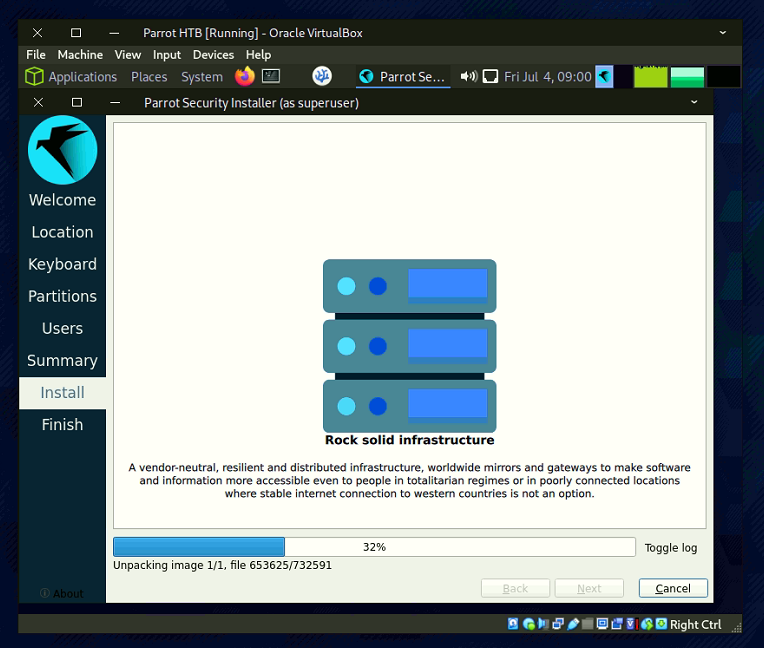
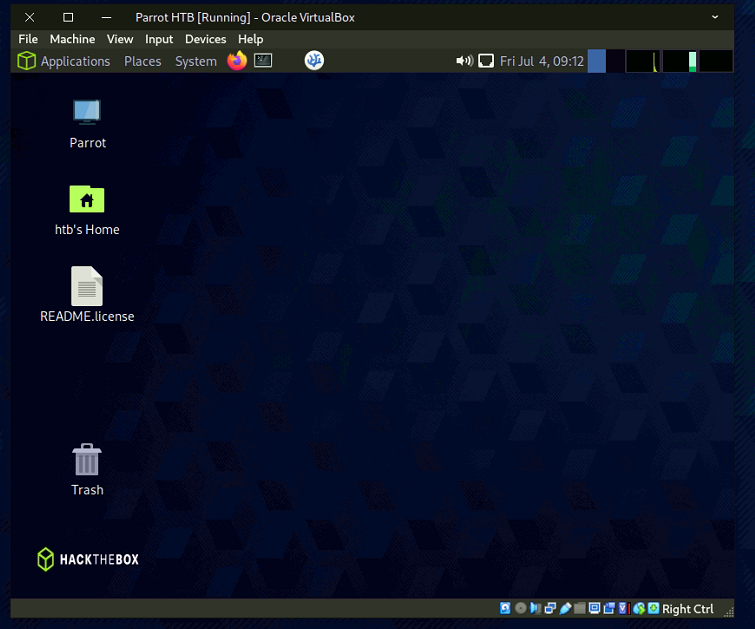
Step 6: Set Up Parrot Desktop Virtual Machine (recommended)
-
To simulate the HTB environment, we will use the HTB Parrot VM.
-
Make sure to disable 3D acceleration.
-
Set Adapter 1 to Internal Network.
-
Adjust the processor count according to your system's available resources.


Step 7: Test Your Lab Environment & Perform an Initial Scan
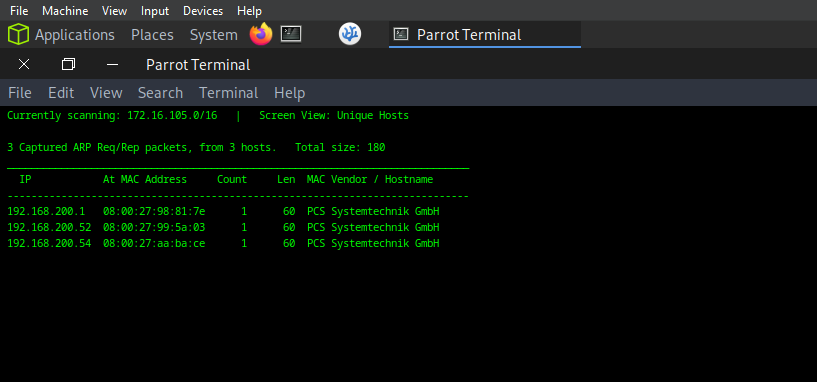
7. 1 Start by using Netdiscover to identify active devices on your local network:
sudo netdiscover
Netdiscover scans the local network and displays a list of active IP addresses and their associated MAC addresses. It helps you identify which devices are currently connected to the same LAN.
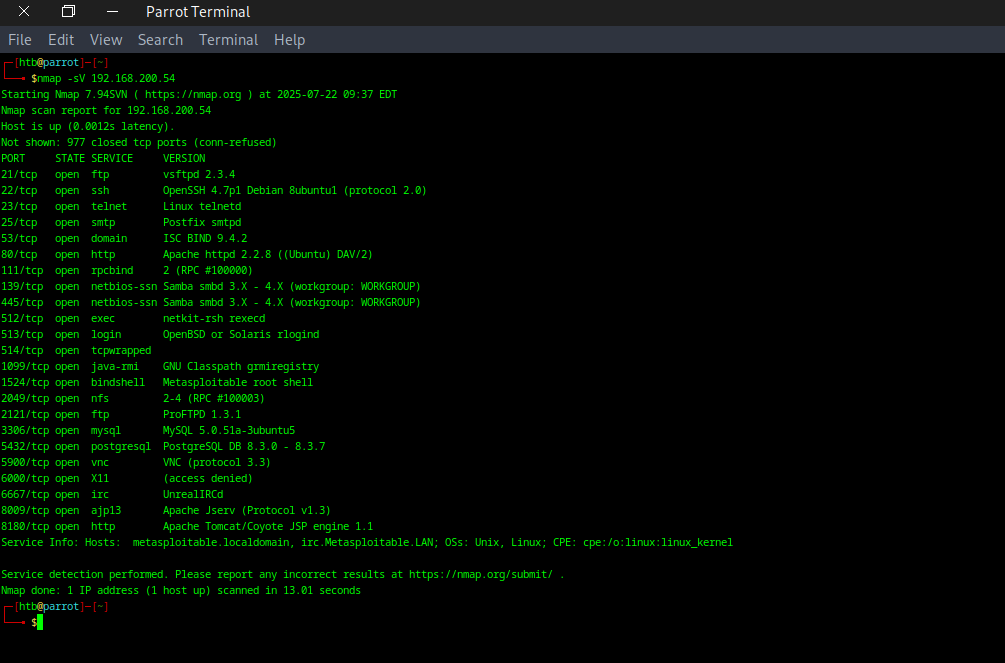
7.2 Next, run a basic Nmap scan to enumerate services on a specific target:
nmap -sV 192.168.200.50
-sV: Enables version detection, allowing Nmap to determine the versions of services running on open ports.
192.168.200.50: Replace this with the actual IP address of your target machine in the lab.
Reference:
https://www.kali.org/docs/virtualization/install-virtualbox-guest-vm/
https://parrotsec.org/docs/virtualization/install-parrot-on-virtualbox/
https://docs.rapid7.com/metasploit/metasploitable-2/
Ethical Hacking: A Hands-on Introduction to Breaking In Paperback by Daniel Graham
https://www.amazon.ae/Ethical-Hacking-Hands-Introduction-Breaking/dp/1718501870
On to the Next Challenge!